Purpose of this blog

Dmitry Yudo aka Overlord, jack of all trades
David Lister aka Listy, Freelancer and Volunteer

Thursday, March 13, 2014

[WoTB] Ready for Beta!?

Obviously, it's still somewhat semi-official, but we have finished preparations for closed beta on the tech side.

This means [provided that nothing extraordinary happens of course] in the very near future you will be able to get hold of tanks on your mobile. For now on:
  • iPads: 2, 3, 4, air, mini, mini Retina
  • iPhones: 4S, 5, 5C, 5S (phones are not supported officially as of now, but technically you will be able to install and play the game)
Follow the news for more information on when&how to join the beta.

PS: Andorid version for selected devices is already full-functioning, however the beta for Android devices will start at a later date.

Sunday, March 9, 2014

Pakistan's Waterloo

Tanks are mighty behemoths of destruction, but in one case they have created as well.  This all happened during the short 1965 war between India and Pakistan.

India was having a bad time of it in the early 1960's.  In 1962 China had defeated them militarily in the Himalaya war, then in 1964 its much loved Prime minister had died. Hostilities then began to escalate with Pakistan in mid 1965, until all out war broke out with both sides launching attacks, skirmishes and infiltrations on the same day.
The first official act of war was when the Indians launched a large attack across the border aimed towards Lahore in early September.  This attack was stopped when it reached the Ichogil Canal.  Despite the Indians knowing about the waterway they were utterly unprepared for forcing a crossing and their attack stalled.

With the Pakistani troops defending the bridges or having blown them up the Indians had no means of conducting an assault crossing. In one sector however, two companies of infantry did manage to use the rubble from a destroyed bridge to cross.  On the same day the Pakistani's launched a massive counter attack with its 1st Division.  This counter attack forced the Indians back, as their forces began collapse and rout in the face of overwhelming fire-power.  The Indian forces began to dig in in an attempt to hold their ground.

The 1st Division consisted of about 300 M48 Pattons, in three armoured brigades.  The M48's were newly purchased from the United States.  Equally every other branch in the 1st Division was equipped with new equipment.  Arrayed against them were the Indian forces, mostly equipped with M4 Shermans armed with 75mm guns. There were some 76mm armed tanks and a few units of Centurions in addition to the Shermans.
The Pakistani First Armoured Division was given a final objective over 100 miles inside India, but first it had to capture the village of Khemkaran 5 km from the border. The initial advance was beset with delays, at first bridge construction over the Rohi Nala river was several hours behind schedule, then one of the tanks got stuck on the bridge which left only about a companies worth over the river.

Then on the 7th of September the Pakistanis split their forces, although they regrouped towards evening, in the region of Khemkaran.
Near Khemkaran was the Indian infantry of 4th Battalion of The Grenadiers.  One of the companies had the 32 year old Havildar (roughly Sergeant) Abdul Hamid.  After 5 years of service he had been appointed to Company Quartermaster.  The 4th Battalion had advanced to the Ichogil Canal, and after the failure to cross the Indian forces had fallen back. The 4th Battalion had been in action for the previous 24 hours with no rest.
Havildar Abdul Hamid
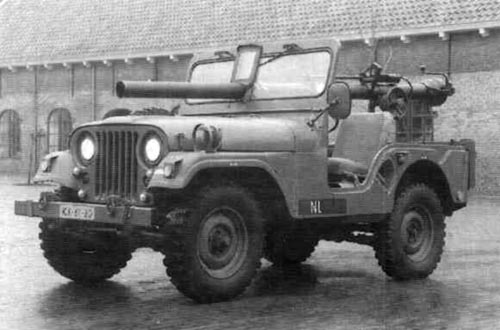
By then they had fallen back near to a village called Chima, where they had began to dig in on either side of the main road.   They deployed their four jeep mounted 106mm Recoilless rifles covering the road.  The weapons were perfectly sighted, using ploughed muddy fields to increase their fields of fire, while the guns were dug in behind sugar cane or cotton bushes.  The recently ended monsoon also made the ground so much harder for the tanks to use.
Havildar Hamid was very familiar with the 106 mm's, having spent his entire career crewing them.  He was also considered the best shot with the recoilless rifles in the battalion.  His skill with these weapons meant that although he maintained the rank of his former station he was still the leader of the battalions AT platoon.

Suddenly Patton tanks appeared from the direction of the canal, barrelling down the main road.  The lead Patton through luck spotted Havildar Hamid, halted and the commander of the tank yelled to Havildar Hamid asking for directions.  His response was a 106 mm shell that destroyed the tank.  The crew frantically re-loaded and Havildar Hamid destroyed a second and then possibly a third tank (note: the reports from multiple sources are contradictory as to exactly when he knocked out the tanks).
The 9th was relatively quiet, and the 4th Grenadiers carried on digging in.

At 0800 on the 10th the Pakistani forces tried again for a big offensive.  M24 Chaffee tanks approached the line the Grenadiers were holding under the cover of Pattons and artillery fire against suspected positions, they tried to scout the front line and force the AT guns into giving away their position.
The Indian gunners wisely held their fire, crouching in their fox holes while the artillery sent shock waves through the air and kicked up splats of mud.
After this Pattons moved up in force several tanks abreast and began to roll forward with all their guns blazing. By 0900 the Pakistanis shifted their attack to a weaker position, Havildar Hamid spotted another column of Pattons smashing through the forward company position.

Despite the artillery fire Havildar Hamid drove his Jeep mounted 106 mm out of its position and took up a flanking position to the thrust smashing through the infantry.  Once behind another bush and within range Havildar Hamid opened fire.  His first shot destroyed the lead Patton. Recoilless rifles have a massive firing signature, so knowing he was likely spotted Havildar Hamid reversed his Jeep and moved to a different location.  Once aimed and set he fired again.  The 106mm round smashed into the target Patton causing it to burst into flames.  As he pulled out of position the Pakistanis saw him, and started firing everything they had at him.
With bullets sleeting past like hailstones, and tank shells thudding down near him Havildar Hamid calmly aimed at a third Patton.  Again his third shot of the day flew true and destroyed the Patton. Once reloaded Havildar Hamid aimed at a 4th Patton.  The Patton fired and the HE shell landed close enough to Havildar Hamid’s unprotected Jeep.  The entire crew were killed by the blast.
Again accounts do not record if Havildar Hamid destroyed the 4th tank.  But we do know that Havildar Abdul Hamid killed seven Pattons in those two engagements.  For this he was awarded the Param Vir Chakra medal, India's highest decoration for valour.

Elsewhere the Pakistanis were suffering just as badly.  In many places the Indian tankers hidden in the lush undergrowth or by sugar canes in their Shermans waited until the Pattons were at point blank range before firing.  Equally the monsoon soaked ground caused such bad mud that the Pakistani tanks simply bogged down.
The attack by the vaunted 1st Armoured Division began to break down and lose momentum.
The Divisional Commander came forward in his tank to try and get the stalled attack moving again. However the Indians picked up the radio signals from his command tank, and promptly shelled him with their Second World War vintage 25 pounders and BL 5.5" guns.  One of the guns got lucky and killed the Divisional Commander.

With no leadership left and suffering badly at the hands of the dug in Indians, the Pakistanis fell back.  One of the 1st Lieutenants that retreated that day was Pervez Musharraf, who later became president of Pakistan.
But what of the creation I spoke of at the start?  Well all the Pattons that the Indians captured were taken to one place.  Slowly over time a settlement began to form.  Then the tanks were removed, and are now displayed across India on war memorials.
The settlement at the graveyard of the Pattons continued to grow, and for a time was named Patton City. Although it appears to have reverted to one of the names of the local villages either Bhikhiwind or Khemkaran, western sources are not exactly clear on this.

Thursday, March 6, 2014

[WoWP] Update 1.2

Major update 1.2 for World of Warplanes is now live.


The key features are:

  • replays (finally)
  • battle missions 
  • advanced post-battle statistics
  • physics and balancing changes
  • interface improvements 
Any feedback? 

Monday, March 3, 2014

[WoT] Restoration of T-34

Made in WG documentary on Restoration of legendary T-34.

Watch the movie here. RU voiceover, EN subtitles.


Sunday, March 2, 2014

Wings of fury

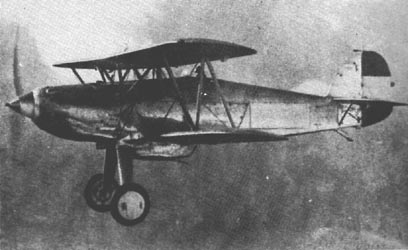
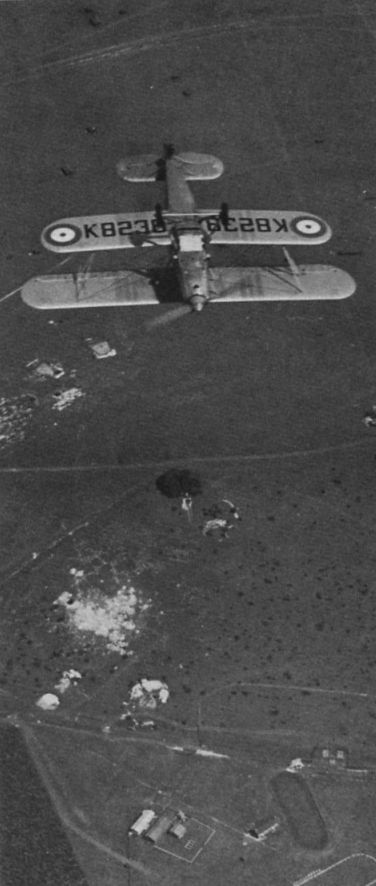
Many of you will have heard of the Hawker Sea Fury, the monoplane fighter that served in several air forces just after World War Two. However there was a biplane called the Hawker Fury that served around the world just before the war. It remained in service with some air forces even during the Second World War.
The Fury was the RAF's first fighter that could exceed 200mph.  In 1931 the Fury entered service with the RAF, and remained in service until January 1939.
One of the main selling points of the Fury was that it could be fitted with a huge variety of engines, which meant eight countries brought it, and most fitted their own preferred engines.

In 1941 Yugoslavia had two squadrons of 15 Furies, these were Grupa 35 and 36.  Grupa 36 was based at the airfield at Rezanovacka Kosa.  The Yugoslavian Air Force was formed from pilots with little experience or training. They had suffered a blow when the high ranking officer Vladimir Kren had stolen an aircraft and defected to Austria. Despite this setback the morale of the pilots was exceptionally high.
To add to their confidence the Yugoslavs had received an intelligence warning of the impending German attack, and had therefore began quietly mobilizing their forces.  This included dispersing the air force to fifty smaller airfields.  The intelligence was so good the Yugoslavs even managed to predict on which day the German attack would fall.

Grupa 36 had been warned to expect German bombers on April the 6th, 1941.  Before 0600, as the sun poked over the wooded hills on the horizon two Furies were dispatched on patrol to look out for German bombers.  The remainder of the Grupa's pilots were stood to, in position in their aircraft with the engines switched on and running at idle.
At 0611 over the voices of the ground crew and pilots, and the soft chugging of the Furies engines came the harsh roar of German engines at full power.  Around thirty ME-109's and BF-110's stormed towards the airfield.  The Yugoslavian pilots reacted immediately, ramming their throttles to full power as they bumped along the runway.  The sudden movement of their victims caused most the Luftwaffe attacks to miss and only one Fury was destroyed on the ground. Unfortunately however, three trainers and an ambulance aircraft were destroyed.
The Luftwaffe planes looped around and dived onto the gaggle of biplanes who were clawing for altitude. Despite the good (for a biplane) rate of climb the Germans in their vastly superior machines had every advantage.  Soon the Furies were crumpling under the strikes of the Germans cannon shells but the Germans didn't have it all their own way in the 19 minute dogfight that followed, as two of the BF109's were shot down by Furies.

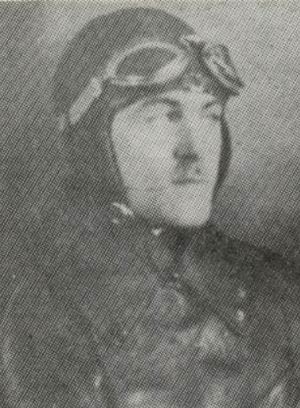
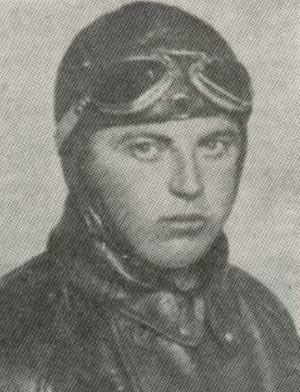
Kapetan Konstantin A. Jermakov had been born in Russia, but had ended up in the Yugoslavian Air Force as the leader of one of the flights of Grupa 36.  In the dogfight so far he had emptied his guns into the German planes to no effect.  In a fit of rage or desperation, we shall never know which, he flew his plane at a BF110, crashing into the wing.  Both planes fell to the ground in a mangled smashed heap of wreckage killing both pilots and the crew of the BF110.
Kapetan Jermakov
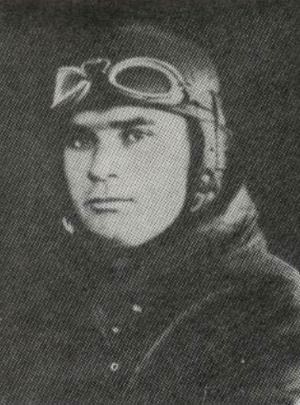
This act of defiance seems to have touched off something within the Yugoslavian pilots.  The other Grupa 36 flight leader, a Bosnian, Kapetan Vojislav J. Popovic, repeated the feat, ramming and destroying another BF110 and killing himself.
Kapetan Popovic
Finally a Serbian pilot, Porucnik Milorad D. Tanasic, went after harder prey.  He managed to catch, and ram into of the BF109's, again with fatal results for all involved.
Porucnik Tanasic
The tally of Germans downed came at a high cost, seven pilots dead, and one wounded. All but one of the Furies in the squadron had been destroyed.
The remaining Fury joined Grupa 35, which fought for the remainder of the war.  The only other air to air engagement was against the Italians, which saw both sides having aircraft shot down.

Furies were to see action once more in the Second World War, their last engagement is strange in that it technically wasn't under any air force.

In August 1941 the Soviets and British forces invaded Iran. The Iranians resisted, but in a patchy way.  In some places they put up fierce fights, in others little resistance. The Iranians were facing an overwhelming force and the matter was decided before it began.
Less than three days later the war was all but over, political agreements meant that the Shah issued orders for a cease fire, including orders to the main Tehran airbase not to engage Soviet paratroopers should they land.
Iranian Pilots by their Furies
The men of the airbase mutinied at these orders, arresting the Chief of the Air force as he tried to enforce the orders.  The Army moved to crush the defenders, sending an armoured column against the air base, and surrounding it with AA guns.  Two pilots took their Furies up in the face of the AA guns and made a strafing run on the armoured column then flew off and simply disappeared.

On September the 17th a flight of five Polikarpov I-16's heading to reinforce the Soviet forces in Iran were over the Caspian sea approaching land, when the two Furies reappeared.  The Iranians immediately launched an attack on the Soviets.  Their planes were outclassed and one of the Furies was shot down.
The distance the Furies had flown to attack was suddenly demonstrated, as in the intervening weeks the Iranian pilots hadn't been able to secure any more fuel. The second Fury ran out of fuel and crashed into a forest.

Wednesday, February 26, 2014

What I did on my Holidays

Overlord has asked me to do some more articles for this site. Now I have my Day job to do, and these articles actually take a bit of time, so I said I would try to stick up the odd piece on a Wednesday. These will likely be shorter and a different format to the Sunday article. They will not be a regular feature either. So without any further ado, lets get on with it.

On the 14th I had special (written and signed in triplicate) permission from my other half to disappear down to Dorset. To visit the Bovington Tank Museum. This would be my first visit, and thanks to a nice chap named Ed, and a very nice lady called Roz (who was too shy to get on camera), they agreed to open up the Vehicle Conservation Centre so I could have a walk round some of their rarer pieces.
As I had my camera with me I figured you lot might like to see some of the results.

First up we have this Vickers light Amphibious tank:
You can see the usual Carden Loyd running gear. More interestingly its got a Vickers HMG in the turret. Much like early Cruiser tanks and the Matilda. So it could theoretically mount a .50 cal Vickers HMG, meaning you might in the far future see it in game.

Next we have the D3E1 Wheel-cum-track:
An idea that was all the rage in the inter-war years. The idea is you can use the wheels on road, but when you need it as a tank you raise the wheels up and off you set. So in theory the best of both worlds.
However you also get twice the complexity and it is likely to break. That said the Germans did use a wheel-cum-track design in the Second World War.

Next we have the Excelsior:
A tank that you all will know from World of Tanks.

Next a very fetching Stridsvagn L-60:
Hopefully we'll see it somewhere in either the Combined EU or a separate Swedish tech tree.

Now we come to a Saladin:
As I've long been joking: World of Armoured Cars, you all know it makes sense. What better advert for it than something this cute?

There was also this little oddity:
Now it was defiantly Canadian, so either a Ram or a Grizzly (I forget which) but it has a gun with a muzzle brake. So I guess a US 76mm.

As I pressed deeper I found a real prize:
As you can see this is the QinetiQ ACAVP. QinetiQ is what's left of the UK Governments defence research department. The tank its self was a technology test vehicle, and is made out of plastic. Yes that's right, its really made out of plastic armour.

Now those of you who are in the UK know that the week I went down to Bovington parts of the UK were doing a passable impression of a submarine. As I was clicking away I didn't know it but my camera had gotten a bit wet and the pictures weren't being recorded. This was the last picture that I could recover from my camera before it gave up the ghost completely:
So can you ID the tank?

After Bovington I got back to my hotel only to find the water from the river already washing over the road, and the hotels garden was submerged. So I quickly grabbed my gear and checked out despite me being due to stay another night. I timed it just right as I had to drive through three floods on the way home, one of which was on a motorway!

The Good news is I have a much better camera now, and I'll have to make plans to go back.

Sunday, February 23, 2014

Cold Gold

Convoy QP11 steamed out of Murmansk on the 28th of April 1942 and passed the Kola Inlet into the frozen Arctic seas, lashed by wind and water.  The temperature could easily fall to -10 degrees, and the ships decks would often become sheets of ice.

QP11 consisted of 13 freighters and their escorts.  One of the warships that accompanied the convoy was HMS Edinburgh, a Town class light cruiser (Similar to HMS Belfast in London).  She was the convoy’s command ship, and located within one of her magazines was 4570 Kg of solid gold.  This was a part payment from Russia to the UK and USA as part of the Lend Lease program.  In 1942 this was worth 1.5 million pounds.
HMS Edinburgh
Two days later HMS Edinburgh had detached herself as forward picket, and gone ahead on patrol.  As she reached the limit of the 20 mile circuit, she prepared to return to the convoy.  Thinking they were out of the immediate danger her crew were stood down from general quarters status which they had been maintaining for the previous 48 hours while in the area of most risk.

A few hundred yards away lay the German submarine U456 which had been lying in wait for the convoy. The submarine had only two torpedoes left after its patrol, and it watched the zigzagging HMS Edinburgh. As chance would have it Edinburgh turned onto a new course just as she got within firing range of the U-boat.  If she had turned the other way, this entire story wouldn't have happened.
At 1555 on the 30th of April the Edinburgh's ASDIC operator reported a contact, very near by and they were closing on it. It was judged to be a false contact.
Realising that the cruiser would maintain the course she currently had, the U-boat fired both torpedoes.

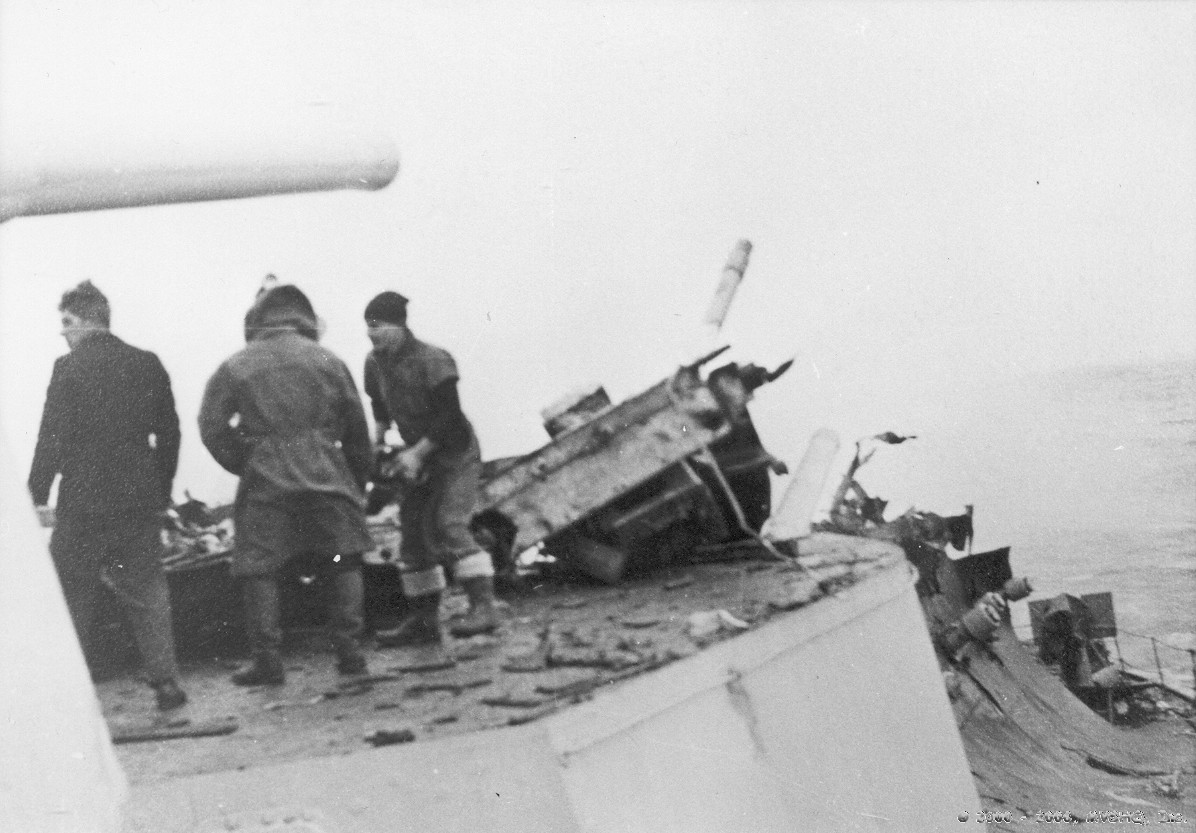
None of Edinburgh's crew saw the torpedoes as they streaked towards her.  Both were perfectly aimed and slammed into her starboard side.  The first torpedo struck her amidships and tore through to the boiler room and shattered Edinburgh's fuel tanks.  The blast had also cracked open the deck, dropping about 50 sailors into a storage tank which then began to flood with oil.
The second torpedo hit the stern and caused the most critical damage.  The explosion blew the deck plates up, wrapping the armour around the rear turrets and rendering them utterly inoperable.  The blast caused a similar effect on the stern pushing the hull downwards to form a sort of keel from the damage. 
Two of the four propellor shafts were also destroyed, as was the clothes stores and ships power was lost.  Of the guns, only B turret could still be operated, but it could not be rotated nor did it have director control.
Spewing heavy fuel oil, and listing badly the Edinburgh drifted to a halt, utterly at the mercy of the U-boat.  Luckily the U-boat lacked any further means of attack.
Signalling for assistance the Edinburgh drifted helplessly. The crew were shivering and freezing as they were exposed to the worst of the weather without the clothing to protect them. However the rest of the convoy was currently under attack, and so no help could be dispatched.
Bridge of HMS Belfast, showing the weather that could be encountered
Eventually a small force of two Soviet destroyers and two British destroyers were freed from the defence of the convoy and reached the stricken Edinburgh at about 1730.

By now the damage control parties had managed to get Edinburgh's propulsion working and she could make a maximum speed of 8 knots on one shaft.  Unfortunately though due to the damage caused by the second torpedo she could only steam in a giant circle.
One of the destroyers (HMS Forester) managed to attach a tow line to Edinburgh's bow. The tow line broke under the strain with such force it sounded like a gunshot, and the cable wrapped itself around a stanchion. Four further attempts all ended the same way.

As the officers devised a new plan, suddenly a lookout yelled a warning about a submarine three miles astern.  HMS Forester immediately went to full power and healed over towards the contact to engage.  As she approached the spot where the U-boat had crash dived her captain ordered her to slow ahead so the ADISC could get a reading.
HMS Forester’s throttles had jammed wide open, so the ship overshot.  By the time she could be brought back under control the submarine was long gone. A couple of depth charges were fired in the vain hope of hitting.  Again chance appeared, and unknown to the crew of the HMS Forester one of the depth charges did damage the U-boats periscope.

The new plan to tow the Edinburgh was successful. The line was attached to the stern of the ship, and one of the destroyers could counter the turn. It did mean that the top speed was two knots, and with about 200 miles to go it would take at least four days to reach Murmansk.
So again the crew stood too, with out clothing, food or sleep in the bitter Arctic night.  Some relief was provided by hot cocoa, but only after a vessel big enough to boil it in was found. As it turned out this was one of the officers bath tubs.

At 0600 the next day the two Russian destroyers signalled they were almost out of fuel and had to return to Murmansk.  On a more positive note a Russian tug and four Minesweepers were already on the way to support Edinburgh.
Overnight a force of German destroyers had attacked the Convoy but had been seen off, knowing the Germans were in the area in force the Admiral considered his position and issued the following signal to her escorts:

"In the event of attack by German destroyers, Foresight and Forester are to act independently taking every opportunity to defeat the enemy without taking undue risks to themselves in defending Edinburgh.  Edinburgh is to proceed wherever the wind permits, probably straight into it. If the minesweepers are present they are also to be told to act independently, retiring under smoke screens as necessary."

At 1800 the Rubin, the Russian tug appeared, and about midnight the four minesweepers hove into sight. It was then found that the tug had insufficient power, so one of the minesweepers had to assist in the towing. The other minesweepers split up to take positions round the damaged Edinburgh.  The rear most minesweeper (HMS Hussar) suddenly spotted three German destroyers following the massive oil slick that Edinburgh was bleeding from her broken hull.
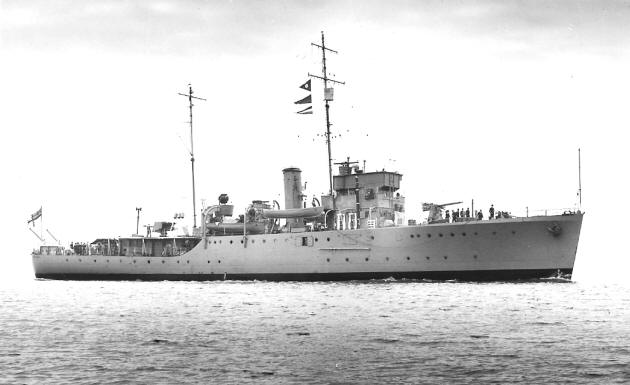
HMS Hussar
The tiny minesweeper launched an attack on the vastly superior destroyers.  Armed with two 4 inch guns HMS Hussar faced off against the German ships, who were each armed with four 5.9 inch guns. Hussar was forced to retreat in short order.
The German force consisted of two of these Type 1936A's

...and the Hermann Schoemann
HMS Hussar's brief action had served its role of rear guard. The firing of the guns had warned the rest of the flotilla. Both the destroyers increased to top speed and turned to take on the Germans.  Edinburgh cast off her tow ropes, raised her battle flag and increased to her top speed of 8 Knots, turning in a huge circle. Several German salvo's fell astern of the battered cruiser.

The two Royal Navy destroyers HMS Forester and HMS Foresight turned towards the Germans and fired spreads of torpedoes.  On the HMS Edinburgh one of the gunnery officers threw open a hatch on the top of B turret, which was still unable to traverse.  Using nothing more than his judgement he waited until the ships bows bore on one of the German ships.  Yelling the command to fire the three guns he managed to bracket the German destroyer Hermann Schoemann.


The Germans broke off laying smoke, and a swirling melee occurred.  Ships of both sides were using the cover of mist and squalls or laying smoke screens as they raced around at speed taking snap shots at targets as they appeared.  Suddenly the HMS Edinburgh found herself pointing at the Hermann Schoemann again, and again the 6" guns roared.  The first two shells bracketed the wildly manoeuvring destroyer and the third smashed into its hull destroying its boilers.  The Hermann Schoemann drifted for the remainder of the battle and was later scuttled.
Elsewhere HMS Forester turned to fire a broadside upon a German ship, only to be engaged by both enemy destroyers.  The punishment HMS Forester took caused her to lose power to her engines and like the Hermann Schoemann she started to drift, as the Germans closed in.  HMS Foresight came to her aid, spewing a smoke screen and she deliberately drove between the Germans and their prey.  HMS Foresight took the salvo meant for HMS Forester which caused her heavy damage as well leaving her with one operational gun and damaged boilers.

To cover their withdrawal the Germans launched a spread of torpedoes at the temporarily immobilized HMS Forester.  Unable to do anything but watch the ships company held their breath for the explosion. It never came as both torpedoes streaked under the hull. 

Chance had one final part to play in the battle. One of the wildly fired torpedoes drew a line straight into the circling Edinburgh.  It hit amidships on the port side, almost directly opposite the hole from the previous hit.
B turret was firing at the retreating Germans when the torpedo hit, the Gunnery officer was blown out of the hatch and just managed to catch himself on the edge of the turret before falling onto the deck or overboard.

With the battle over, and only a few deck plates holding the HMS Edinburgh together the order to abandon ship was given.  The minesweepers pulled alongside and took off the remaining ships company.
After everyone was off the ships pulled away from HMS Edinburgh and waited for her to sink.  After fighting to stay afloat for so long the habit seemed ingrained in the battered ship, and she stubbornly refused to heel over.

One of the minesweepers then fired twenty rounds at the floating carcass. these had no effect other than starting several small fires.  Two salvo's of depth charges were then dropped close to the hull in an attempt to break HMS Edinburgh's back, but still to no effect.
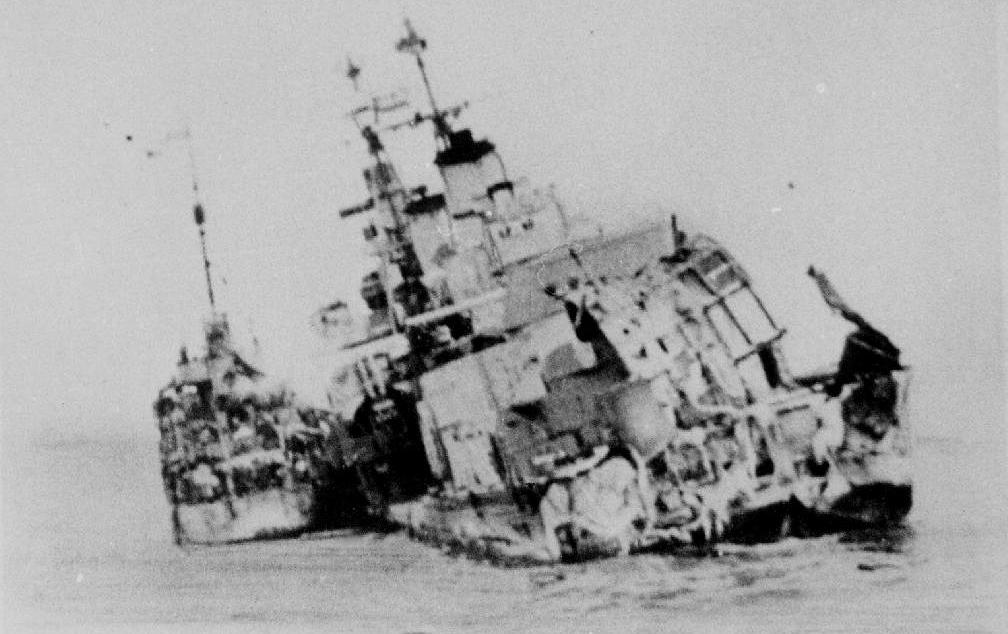
Finally HMS Foresight used her one remaining torpedo on HMS Edinburgh.  The defiant cruiser rolled onto her side then broke in two with the stern sinking immediately. The bow reared up before slipping backwards under the water.
But what of the gold? Before you all start reaching for your wetsuits you should know that most of the 465 bars were recovered in 1980 and 1986.

But five bars are still unaccounted for! Each bar is worth in the region of $400,000.

Sunday, February 16, 2014

Chief of Battle: Part two

 Part one can be found here

Late at night on August the first 1990, Kuwaiti Intelligence learned of the impending Iraqi invasion.  They immediately flashed the warning up through the chain of command.  The Kuwaiti 35th Brigade hurriedly started to mobilise its Chieftain tanks.  They were hampered by having some squadrons detached to guard duties elsewhere, and numerous soldiers away on leave.
As the unit began phoning around trying to find soldiers, one of the Brigade officers began combing through personnel files of soldiers on base.  If they'd had any armour training, no matter how long ago, they were assigned to composite crews.
Meanwhile other troops started to load ammunition into the tanks. Unfortunately this wasn't complete by the time the unit moved out at 0600.  In the previous 8 hours the 35th Brigade had managed to find 36 full crews, and partially load their tanks with ammunition. There hadn't been time to boresight (zero) the guns, and the tanks were carrying insufficient supplies of water.  The number of tanks was further reduced when one tank broke down on the very short march north.
The 35th Brigade deployed two battalions that day.  The 7th Battalion had 25 tanks, in three understrength companies while the 8th Battalion, was just a single company of ten tanks.
The 7th Battalion who were in the lead deployed in hull down positions, in a line, near a graveyard between the town of Al Jahra and Mutlaa ridge.  A six lane highway ran diagonally down from the ridge to Al Jahra, and then linked  to a ring road.  There was a police station next to the road on the ridge, and the 7th Brigade sent a reconnaissance vehicle there.  It reported a column of Iraqi's advancing down the road, this turned out to be the Republican Guards Hammurabi Division. 
As the Iraqi's reached the ring road at 0645, the 7th Battalion opened fire.  For the Chieftains with their fearsome firepower the range the Kuwaitis were firing at was practically point blank (around 1500 metres).  Here at last was the tank battle the Chieftain had been designed for, defending a line against a larger force of Soviet armour.

The pounding the Iraqi's were taking suddenly let up. Lieutenant-Colonel Al Wazan, the commander of 7th Brigade had received orders to cease fire and return to base!  For a few moments the Iraqi's could collect their battered wits, then LTC Al Wazan used his initiative and ordered his battalion to open fire again.
By now the 8th Battalion had arrived on the battlefield.  There was an Infantry unit inside Al Jahra that would be surrounded so the 8th Battalion was ordered to advance and link up with the Infantry.
Captain Ali, the commander of the the Battalion moved up to the first obstacle, the six lane ring road around Al Jahra.  He quickly realised that any attempt to cross the road, especially the central barrier would result in a massacre of his unit. With that in mind he fell back and emplaced his company to the east of the 7th Battalion on the other side of a road that led to the west from the Ring road.
Almost immediately after taking up positions a car came screeching up behind Cpt Ali's tank.  He was happy to see the gunner from his normal crew leap out of the drivers seat.  The gunner was the battalions best shot, and had been at home on leave when the news of the Iraqi attack had come in.
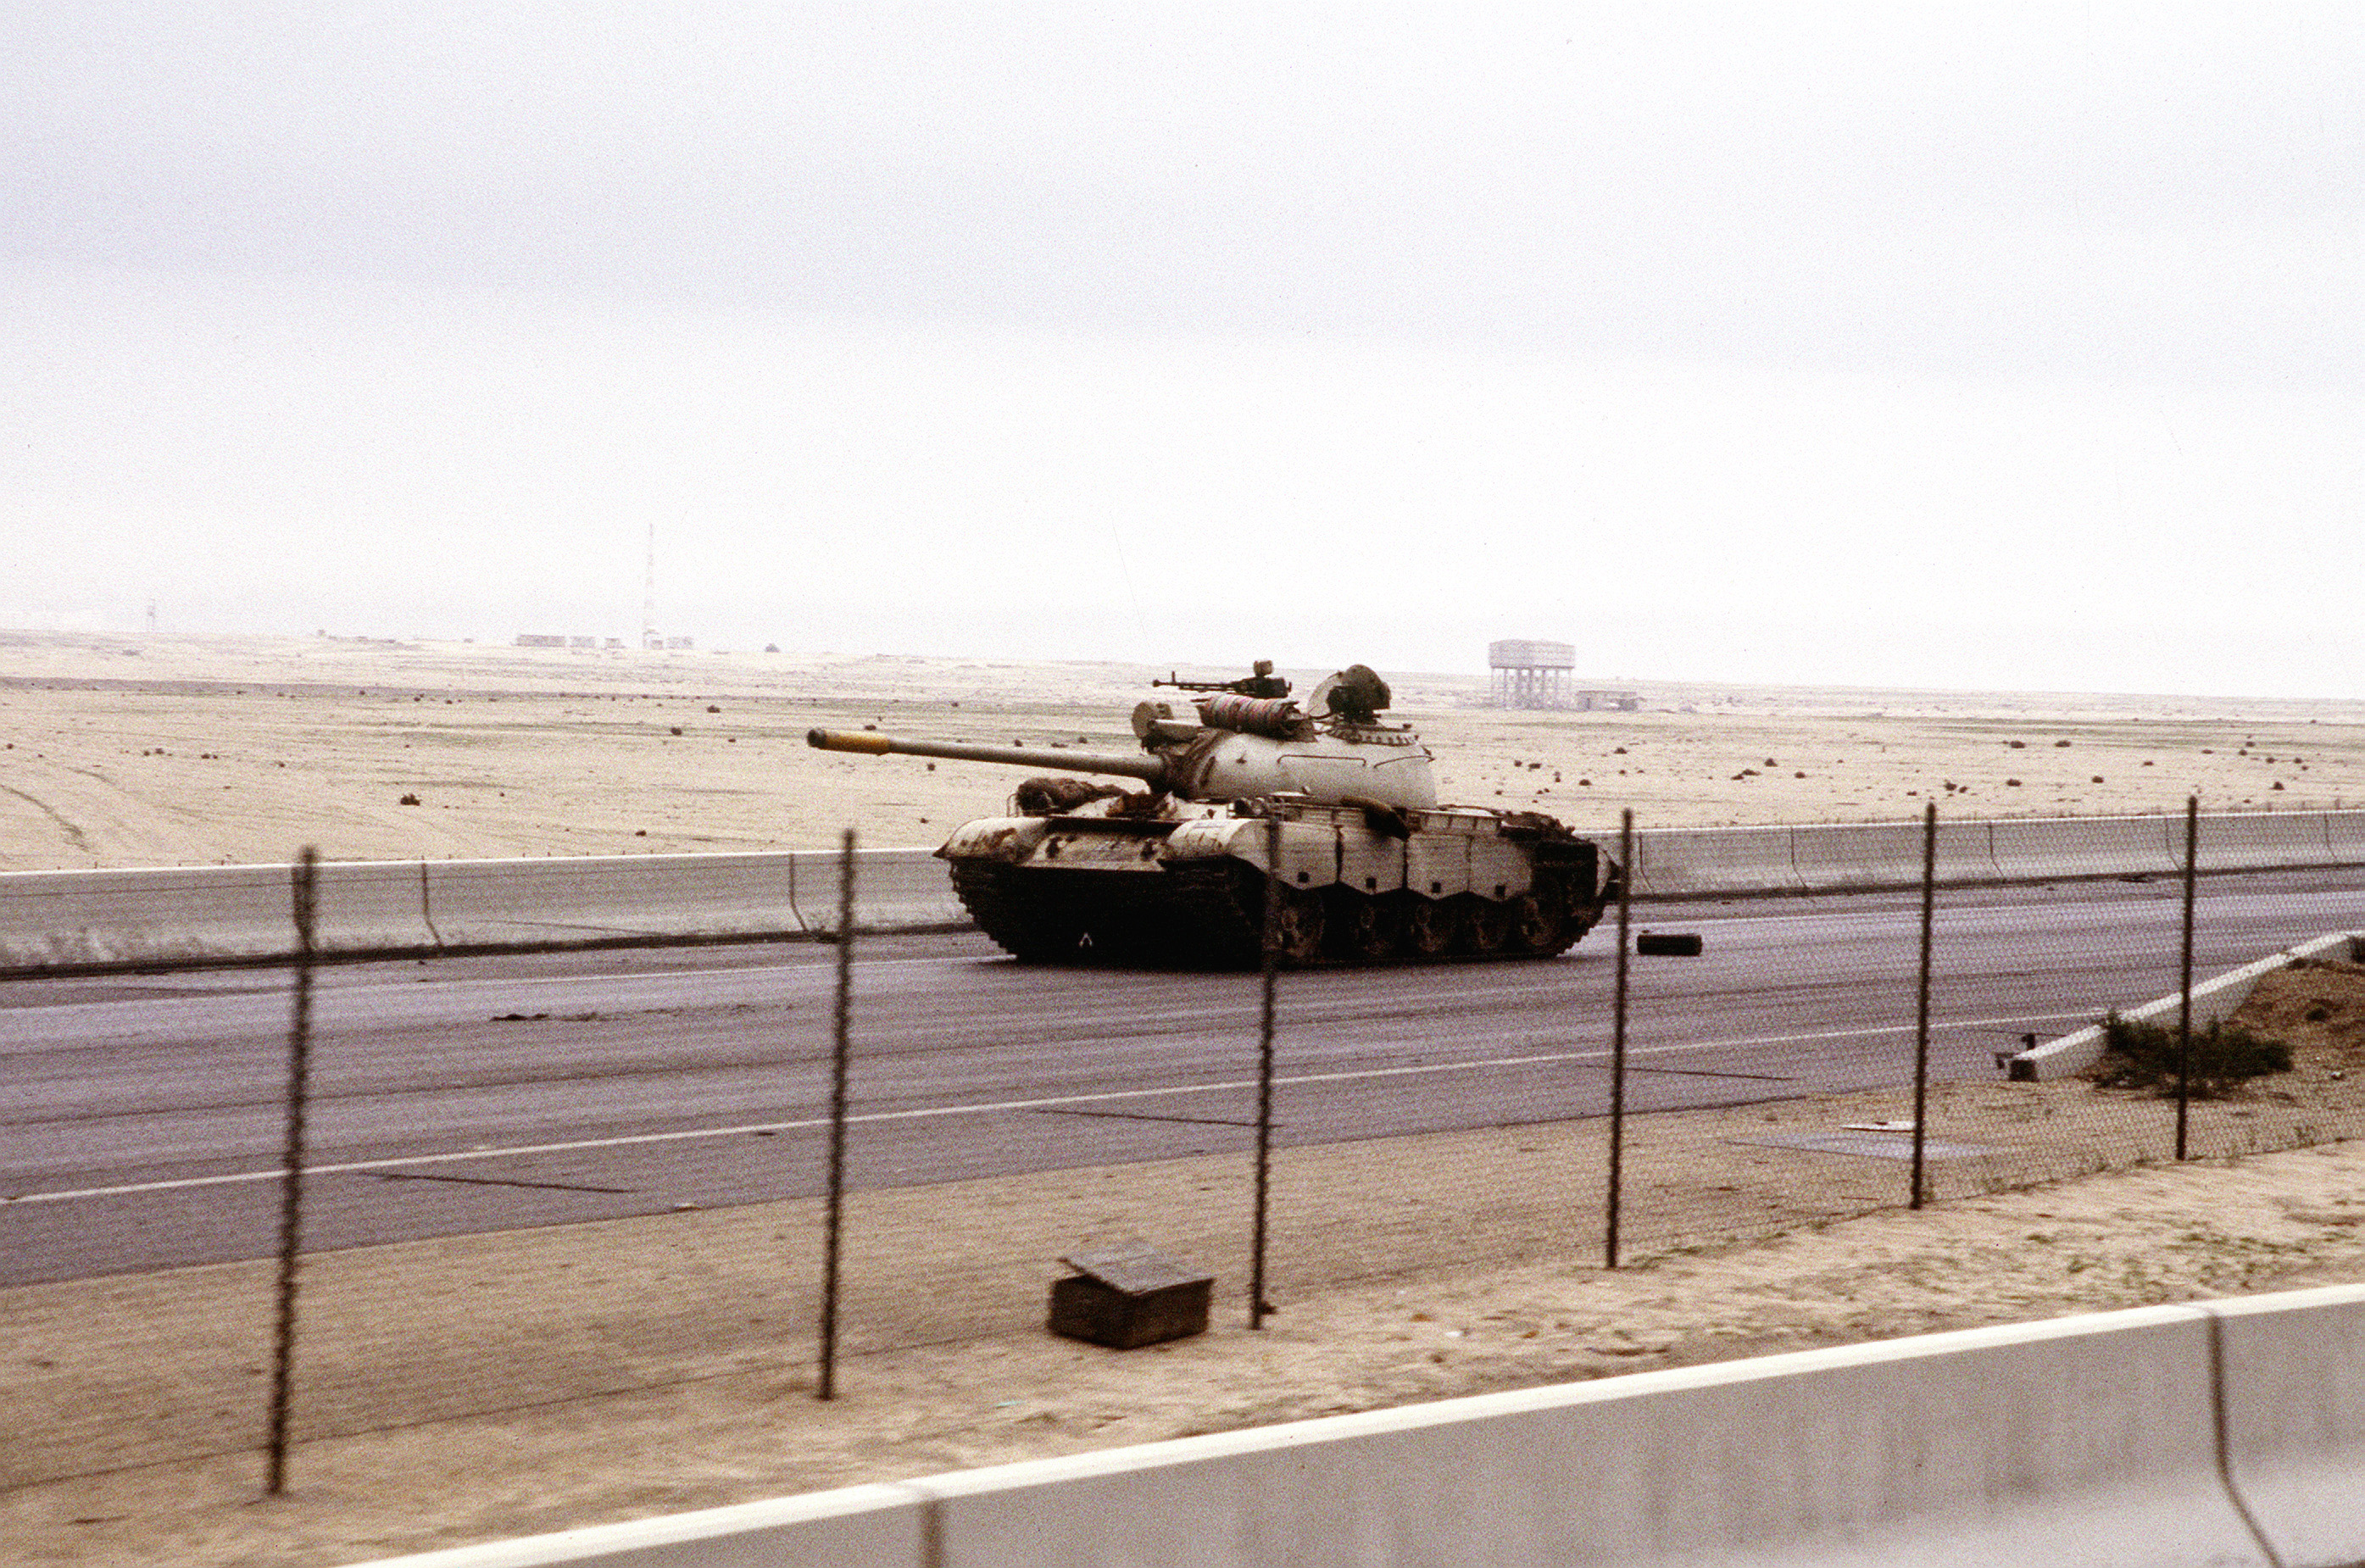
No sooner than the gunner had taken his seat, he spotted and killed an Iraqi command/observation vehicle that was mostly obscured by a bridge.  Then an Iraqi platoon of three T-72's wormed its way through Al Jahra and tried to launch a flank attack on the 8th Battalion.  The Kuwaiti tanks easily spotted them and destroyed all three.
As the morning wore on the tanks had been engaged for a long time, and now the lack of water began to tell, on both sides.  At some of the lulls in the battle soldiers from both sides queued up next to each other to buy water from a local roadside water vendor.
About 1100 hours a new threat began to develop.  Along the road leading to the west came a second Iraqi division.  This was the Republican Guards Medina Division.  A small battery of SPG's had set up there to support the tanks.
The battery commander upon seeing the tanks approach at first thought they were Saudi re-enforcements so he closed with them.  As he got closer he saw the tanks were T-72's. If he ran now after being spotted, the Iraqis would realise they were Kuwaitis and obliterate them.
So he decided to bluff, he walked up to the lead T-72 and spoke to the commander and gathered some intelligence on the Iraqis.  When the tanks drove past they were none the wiser.

With enough warning from the artillery position the 8th Battalion shifted so that it refused its left flank, and could keep the Hammurabi Division to its front and also cover the back of the 7th Battalion.  The Medina T-72's stormed down the road towards Al Jahra unaware of exactly what was happening.
The Medina Division drove between both Kuwaiti battalions and as it entered the frontal arcs of the 7th Battalion all the defenders opened fire wreaking havoc.  As the Medina Division fell back after a very short exchange of fire the artillery battery took them under bombardment.

By early afternoon however, the 35th Brigade was running out of ammunition, the tanks had three rounds left at most and many had less.  Equally the lack of water was becoming a concern.  The biggest issue was that the Medina Division was forming up for another attack from the rear.  With no other choice LTC Al Wazan ordered his brigade to retreat.  The brigade crossed the border into Saudi Arabia at 1630.
The Chieftain had proved it was able to do exactly what it was designed to do, hold larger forces of Soviet armour at bay.  The 35 Chieftains had held up the lead elements of two divisions for nearly ten hours.  As well as the one breakdown the brigade had only lost two tanks in the battle.